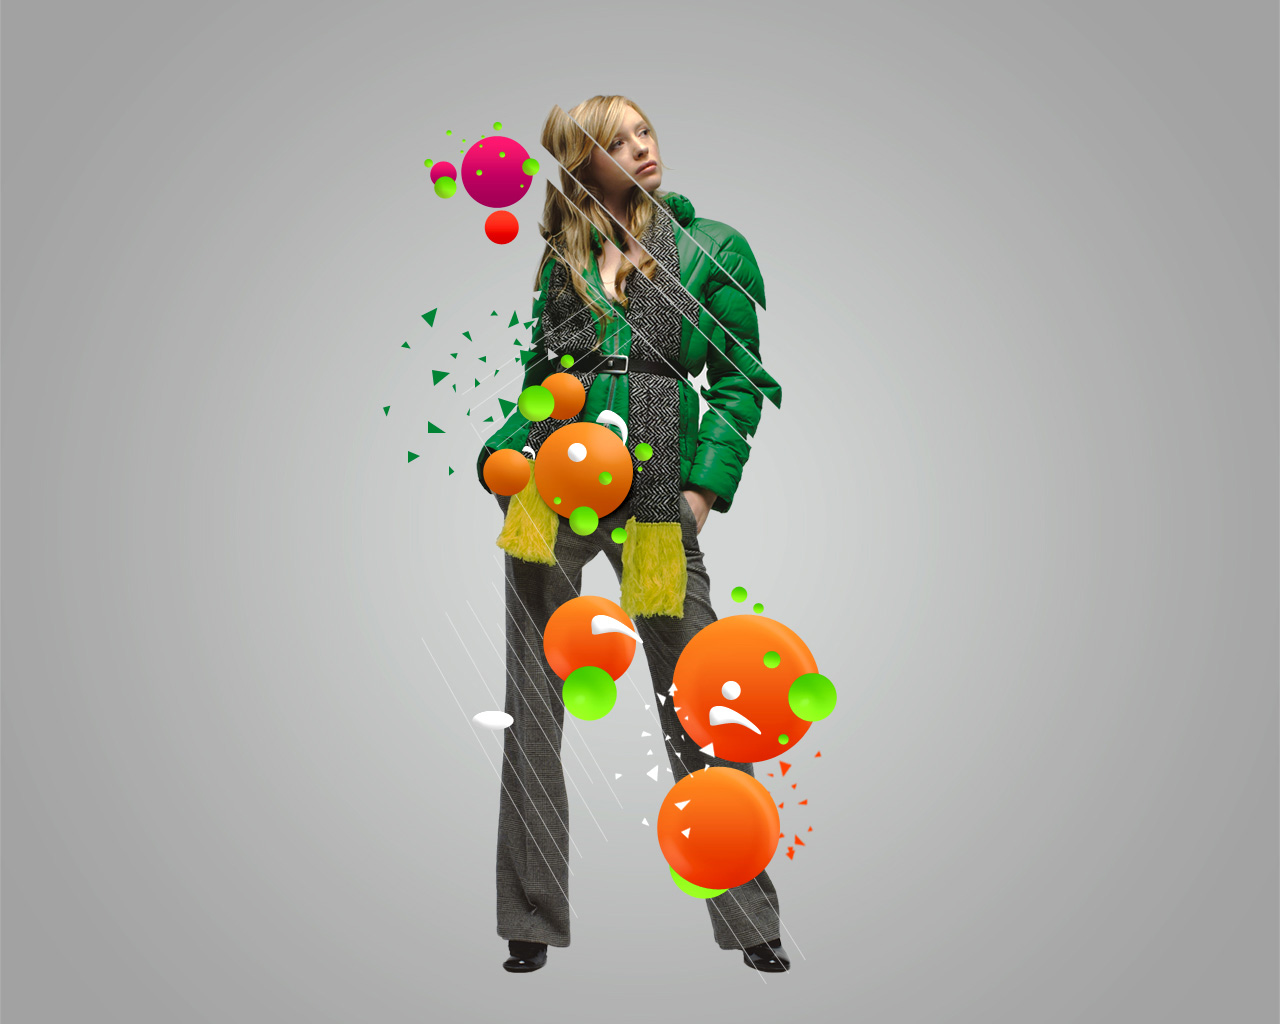
Final Image Preview

Start working by creating a new document (Ctrl+N) in Adobe Photoshop CS5 with the size 1280px by 1024px(RGB color mode) at a resolution of 300 pixels/inch. Create a new layer and click on Add a layer style icon from bottom part of the Layers panel and select Gradient Overlay.

Click in the color bar to open the Gradient Editor and set the color stops as shown. Click OK to close theGradient Editor dialog box.

We’ve got the next background:

Find a stock photo with a model represented on it, I used this photo from deviantart. I would like to thank theauthor of this photo, or if you prefer, you can substitute similar image of your own.

Remove the background using your favorite tools like Pen Tool (P), Magic Wand Tool (W), Magnetic Lasso (L) or even a simple Filter>Extract and insert it on a new layer in our main document.

Make a rectangular selection using the Rectangular Marquee Tool (M).

Right-click inside the selection and choose Transform Selection to rotate and place as it is shown next picture:

Select the Move Tool (V), confirm to apply the transformation and click inside the selection, now you can move the sliced part. This operation needs to be done several times, cutting the girl’s image by parts of different thickness.

Using the Line Tool (U) (set Weight to 1px in Options bar), try to make several lines of white color as shown.

Next we’ll combine in a group all the lines’ layers (press CTRL button and select the necessary layers and then hold on the left mouse’s button while dragging the selected layers on Create a new group icon from bottom part of the Layers panel). Set Opacity to 63% for created group.

Select now the Ellipse Tool (U) and represent a small ellipse.

Click on Add a layer style icon from bottom part of the Layers panel and select Gradient Overlay.

Click in the color bar to open the Gradient Editor and set the color stops as shown. Click OK to close theGradient Editor dialog box.

We’ve got the next result:

Make two copies of the layer containing the ellipse and select the Free Transform (Ctrl+T) command to change the copies’ sizes, situating them also as below. Change the Gradient Overlay settings for one copy too.

Click in the color bar to open the Gradient Editor and set the color stops as shown. Click OK to close theGradient Editor dialog box.

We’ve got the next result:

Take now the Ellipse Tool (U) and draw one more ellipse:

Click on Add a layer style icon from bottom part of the Layers panel and select Drop Shadow.

Add Bevel and Emboss.

Set Gradient Overlay.

Click in the color bar to open the Gradient Editor and set the color stops as shown. Click OK to close theGradient Editor dialog box.

We’ve got the next result:

Using the same tool, mentioned above, continue representing the ellipses:

Click on Add a layer style icon from bottom part of the Layers panel and select Bevel and Emboss.

Add Gradient Overlay.

Click in the color bar to open the Gradient Editor and set the color stops as shown. Click OK to close theGradient Editor dialog box.

We’ve got the next result:

Make a copy of the recently made ellipses’ layers and apply the Free Transform (Ctrl+T)command to change the copies’ sizes, placing them the same way demonstrated next picture:

Take the Ellipse Tool (U) again and make one more ellipse:

Click on Add a layer style icon from bottom part of the Layers panel and select Bevel and Emboss.

Add Gradient Overlay.

Click in the color bar to open the Gradient Editor and set the color stops as shown. Click OK to close theGradient Editor dialog box.

We’ve got the next result:

Place the layer with the ellipse under the orange one, the same way indicated below:

Make many copies of the last represented layer and select the Free Transform (Ctrl+T) command to change the copies’ sizes, placing them as it is demonstrated below:

Next ellipse will be represented with the same Ellipse Tool (U).

Click on Add a layer style icon from bottom part of the Layers panel and select Bevel and Emboss.

Add Gradient Overlay.

Click in the color bar to open the Gradient Editor and set the color stops as shown. Click OK to close theGradient Editor dialog box.

We’ve got the next result:

Make copies of the layer containing the white ellipse, applying for the copies the Direct Selection Tool (A) and the Convert Point Tool to distort the ellipses’ shapes.

Select the Pen Tool (P), set the drawing mode on Shape Layers in Options bar and draw many triangles of the color #00853C.

Insert also several triangles of the color #C9CAC9.

Next we have to combine in a group all the layers containing the triangles (press in this case CTRL button to select the necessary layers and then hold on the left mouse’ s button while dragging the selected layers on Create a new group icon from bottom part of the Layers panel).
Make a copy of the new group, which copy should be rasterized. Press CTRL+E to Merge Down all the layers from group. Using the Free Transform (Ctrl+T) command, we can place the layer with the triangles under the ellipses’ layers.
Click on Add a layer style icon from bottom part of the Layers panel and select Color Overlay.

We’ve got the next result:

Make one more copy of the layer containing the triangles, applying for the copy different Color Overlay settings:

We’ve got the next result:

Click Create new fill or adjustment layer from bottom part of the Layers panel and click to Exposure. Adjust the following options:

We’ve got the next result:

Click once again Create new fill or adjustment layer from bottom part of the Layers panel and click toCurves to adjust the curve shape as shown to make a little color corrections.

We’ve got the next result:
Finished!
View full size here.
Download free Layered PSD file.
No comments:
Post a Comment